
nikon d40x user guide
Nikon D40X User Guide: A Comprehensive Overview (April 28, 2026)
Welcome! This comprehensive guide, dated today – April 28, 2026 – will expertly navigate you through your new Nikon D40X, ensuring successful operation and maintenance.
Congratulations on acquiring the Nikon D40X! This digital SLR camera represents a fantastic entry point into the world of professional-quality photography. This user guide is designed to be your reliable companion, offering a step-by-step approach to understanding and utilizing all the features this camera provides.
Whether you are a beginner or have some prior experience, this manual will help you unlock the full potential of the D40X. We’ll cover everything from initial setup and basic controls to advanced shooting techniques and data transfer. The D40X is built for both ease of use and creative exploration, allowing you to capture stunning images with confidence.
This guide will also address connectivity options, ensuring seamless integration with your computer for image management and editing. Prepare to embark on a rewarding photographic journey!
Key Features and Specifications
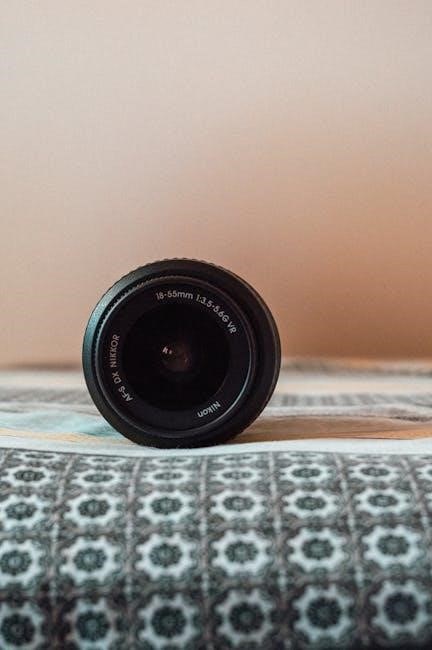
The Nikon D40X boasts a 6.1-megapixel CCD image sensor, delivering detailed and vibrant photographs. It features an eleven-point autofocus system for sharp subject capture, alongside a range of shooting modes including Auto, Program, Aperture-Priority, Shutter-Priority, and Manual.
Its compact and lightweight body enhances portability, while the intuitive control layout ensures ease of operation. The D40X supports SD memory cards for ample storage and offers connectivity via USB for swift data transfer to your computer.
Key specifications include an ISO range of 200-3200, a continuous shooting speed of 2.5 frames per second, and compatibility with Nikon’s DX-format lenses. This camera is designed for both beginners and enthusiasts seeking a versatile and reliable imaging solution.
Sensor and Image Processor
At the heart of the Nikon D40X lies a 6.1-megapixel CCD image sensor, meticulously engineered to capture images with impressive detail and clarity. This sensor size, coupled with Nikon’s image processing technology, delivers a wide dynamic range and accurate color reproduction.
The camera’s image processor efficiently handles image data, minimizing noise and maximizing image quality, even at higher ISO settings. This combination allows for vibrant, lifelike photographs suitable for various applications, from prints to online sharing.
The sensor and processor work in harmony to provide a responsive shooting experience and ensure exceptional image fidelity, making the D40X a capable performer in diverse lighting conditions.
Body and Build Quality
The Nikon D40X features a compact and lightweight body, primarily constructed from durable polycarbonate plastic. While not fully weather-sealed, the robust build offers reliable performance for everyday shooting scenarios. Its ergonomic design provides a comfortable grip, even during extended use.
The camera’s relatively small size makes it ideal for travel and discreet photography. Despite its lightweight nature, the D40X feels solid and well-constructed in hand. The button layout is intuitive, allowing for quick access to essential camera settings.
Overall, the D40X’s body prioritizes portability and ease of use without sacrificing essential durability.
Autofocus System
The Nikon D40X employs a 3-point autofocus (AF) system, utilizing a single cross-type AF sensor for enhanced accuracy. This system effectively tracks subjects in various lighting conditions, though it may struggle with fast-moving objects or low-contrast scenes.
Users can select between AF-S (single servo) for stationary subjects and AF-C (continuous servo) for tracking moving subjects. The AF area mode allows choosing between focusing on the center point, dynamic-area AF, or manual focus.
While not as advanced as systems found in higher-end Nikon models, the D40X’s AF system delivers reliable performance for general photography needs.
Getting Started: Initial Setup
Upon unboxing your Nikon D40X, the initial setup is straightforward. First, insert a compatible memory card (SD card recommended) into the designated slot. Next, install the battery, ensuring correct polarity. Power on the camera and follow the on-screen prompts to set the language, date, and time.
The camera will guide you through customizing basic settings. It’s crucial to accurately set the date and time for proper image organization. Familiarize yourself with the menu system for future adjustments.

Refer to the included documentation for detailed instructions and troubleshooting tips.
Battery and Charging
The Nikon D40X utilizes a rechargeable lithium-ion battery, providing ample power for extended shooting sessions. To charge the battery, connect it to the supplied battery charger and plug the charger into a standard wall outlet. A charging indicator light will illuminate, typically turning red during charging and green when fully charged.
Avoid using third-party chargers, as they may damage the battery or camera. Fully charge the battery before first use. Battery life varies depending on shooting conditions and features used.
Store spare batteries in a cool, dry place.
Inserting Memory Card
The Nikon D40X is compatible with SD memory cards for storing your photos and videos. Locate the memory card slot, typically found on the side of the camera. Gently insert the SD card into the slot, ensuring it clicks into place. Do not force the card; if it doesn’t insert smoothly, check the orientation.
To remove the card, gently press it further into the slot to release the locking mechanism, then carefully pull it out. Always handle memory cards with care, avoiding static electricity and extreme temperatures.
Formatting the card within the camera is recommended for optimal performance.
Setting the Date and Time
Accurate date and time settings are crucial for proper image organization and metadata. Access the camera’s setup menu – typically represented by a wrench icon – using the navigation buttons. Within the setup menu, locate the “Date/Time” option.
Use the dials to adjust the year, month, day, hour, and minute. Ensure you select the correct date format (MM/DD/YYYY or DD/MM/YYYY) based on your preference. Confirm your settings and exit the menu.
Correct date and time stamping ensures your photos are chronologically ordered and easily searchable.
Understanding the Camera Controls

The Nikon D40X features a thoughtfully designed control layout for intuitive operation. Familiarize yourself with the Mode Dial, which selects shooting modes like Auto, Program, Aperture-Priority, Shutter-Priority, and Manual. The Shutter Button initiates image capture, while the Control Dial adjusts settings like aperture and shutter speed.
The Menu Button accesses the camera’s extensive settings, and the Directional Buttons navigate through menus. The Display Button controls the information shown on the LCD screen; Understanding these core controls is fundamental to mastering your D40X and unlocking its full potential.
Mode Dial Explained
The Nikon D40X’s Mode Dial is central to controlling your shooting experience. Auto Mode simplifies operation for beginners, letting the camera handle all settings. Program Mode (P) offers some control while maintaining automatic exposure. Aperture-Priority (A) lets you set the aperture for depth of field, while the camera adjusts shutter speed.
Shutter-Priority (S) allows control over shutter speed for motion blur or freezing action, with the camera setting aperture. Finally, Manual Mode (M) grants full creative control over both aperture and shutter speed. Understanding each mode unlocks tailored photographic results.
Button and Dial Functions
The Nikon D40X features intuitive controls for seamless operation. The Main Command Dial adjusts settings like aperture, shutter speed, and exposure compensation. The Sub-command Dial, often used with the directional pad, fine-tunes selections within menus. The AF-ON button initiates autofocus independently of the shutter release, useful for back-button focus.
The Metering Mode button selects how the camera evaluates light. The Quality button adjusts image resolution and format. Familiarizing yourself with these key buttons and dials will significantly enhance your shooting efficiency and creative control.
Menu Navigation
Accessing the Nikon D40X’s menu system is done via the Menu button located on the rear panel. The menu is logically organized into several tabs, represented by colored icons: playback, shooting, setup, and custom settings. Use the directional pad to navigate between menu options and settings.
The Sub-command dial often assists in adjusting values within the menu. Pressing the OK button confirms your selections. Understanding this hierarchical structure is crucial for customizing your camera to your preferences and unlocking its full potential. Don’t hesitate to explore!

Shooting Modes: A Detailed Look
The Nikon D40X offers a versatile range of shooting modes, accessible via the Mode dial. Auto mode simplifies operation for beginners, handling all settings automatically. Program mode (P) allows some control over ISO, white balance, and picture control while maintaining automatic aperture and shutter speed.
For greater creative control, explore Aperture-priority (A) and Shutter-priority (S) modes. Manual mode (M) grants full control over both aperture and shutter speed. Experimenting with these modes is key to mastering photographic techniques and achieving desired results.
Auto Mode
Auto mode on the Nikon D40X is designed for simplicity, making it ideal for beginners or quick snapshots. The camera automatically selects the optimal settings – aperture, shutter speed, ISO, and white balance – based on the scene. This “point-and-shoot” functionality removes the complexity of manual adjustments, ensuring a properly exposed image in most situations.
While convenient, Auto mode offers limited creative control. It’s perfect for everyday photography, but for specific artistic visions, exploring other shooting modes is recommended. Remember to focus on composition and framing, as the camera handles the technical aspects.
Program Mode (P)
Program Mode (P) on the Nikon D40X offers a balance between automatic operation and creative control. The camera automatically sets both the aperture and shutter speed, but allows you to adjust other settings like ISO, white balance, and exposure compensation. This mode is excellent for situations where you want a quick setup but still desire some influence over the final image.
Program Mode provides a stepping stone towards more manual control. You can fine-tune the exposure using the exposure compensation dial, brightening or darkening the image as needed. It’s a versatile mode for various shooting scenarios, offering flexibility without overwhelming complexity.
Aperture-Priority Mode (A)
Aperture-Priority Mode (A) on your Nikon D40X empowers you to control the depth of field, while the camera automatically selects the appropriate shutter speed for correct exposure. This is ideal for portraits where a shallow depth of field blurs the background, or landscapes needing everything in focus with a smaller aperture.
In Aperture-Priority Mode, you choose the f-stop (aperture) and the camera calculates the shutter speed. Remember, a lower f-number (like f/2.8) creates a shallower depth of field, while a higher f-number (like f/16) increases it. Monitor the shutter speed to avoid motion blur, especially in low light.
Shutter-Priority Mode (S)
Shutter-Priority Mode (S) on the Nikon D40X grants you control over the shutter speed, allowing you to freeze motion or create intentional motion blur, while the camera automatically adjusts the aperture for proper exposure. This mode is perfect for sports photography, capturing fast-moving subjects, or creating artistic effects like light trails.
In Shutter-Priority Mode, you select the shutter speed, and the camera determines the aperture. Faster shutter speeds (like 1/1000s) freeze action, while slower speeds (like 1/30s) allow more light in and can create blur. Be mindful of the aperture value chosen by the camera to ensure sufficient depth of field.
Manual Mode (M)
Manual Mode (M) provides the ultimate creative control over your Nikon D40X, allowing you to independently set both the aperture and shutter speed. This mode is ideal for challenging lighting situations or when you want to achieve a specific look that automatic modes can’t deliver. You are fully responsible for achieving correct exposure.
In Manual Mode, you adjust both aperture (controlling depth of field) and shutter speed (controlling motion blur and exposure). Use the camera’s light meter as a guide, adjusting settings until the indicator reaches the center for proper exposure. Mastering Manual Mode unlocks your full photographic potential.
Focusing and Metering
Achieving sharp images with your Nikon D40X relies on understanding its focusing and metering systems. The camera offers various Autofocus Modes – Single-servo (AF-S) for stationary subjects, Continuous-servo (AF-C) for moving subjects, and Auto-servo (AF-A) which automatically selects the appropriate mode. Area Modes determine how the autofocus points are used, including Single-point AF, Dynamic-area AF, and Auto-area AF.
Metering Modes – Matrix, Center-weighted, and Spot – measure light differently. Matrix metering is versatile, Center-weighted prioritizes the center, and Spot metering measures a very small area. Correctly selecting these modes ensures accurate exposure for diverse scenes.
Autofocus Modes and Area Modes
Mastering focus on your Nikon D40X begins with understanding its Autofocus (AF) system. AF-S (Single-servo) is ideal for still subjects, locking focus when the shutter button is half-pressed. AF-C (Continuous-servo) tracks moving subjects, continuously adjusting focus. AF-A (Auto-servo) intelligently switches between AF-S and AF-C.
Area Modes dictate how AF points are utilized. Single-point AF uses one selected point for precise focusing. Dynamic-area AF uses the selected point, plus surrounding points, for tracking. Auto-area AF lets the camera automatically select focus points – useful for general photography.
Metering Modes Explained
Accurate exposure relies on selecting the correct metering mode on your Nikon D40X. Matrix metering analyzes the entire frame, providing a balanced exposure – excellent for most situations. Center-weighted metering prioritizes the center of the frame, useful for portraits where the subject is centrally located.
Spot metering measures light from a very small area, ideal for challenging lighting or when precise exposure of a specific subject is needed. Understanding these modes allows you to consistently achieve well-exposed images, adapting to diverse photographic scenarios and ensuring optimal results.
Image Quality Settings
Optimizing your images begins with understanding the Nikon D40X’s image quality settings. Resolution determines the image size – higher resolution offers more detail, suitable for large prints or cropping. Image size options include Large, Medium, and Small, impacting file size and detail.
RAW captures all sensor data, providing maximum editing flexibility, while JPEG offers smaller file sizes with some compression. Picture Control allows customizing image characteristics like sharpness, contrast, and saturation. Experimenting with these settings unlocks your D40X’s full potential, tailoring images to your specific needs.
Resolution and Image Size
Understanding resolution is key to maximizing your Nikon D40X’s image quality. The D40X offers several image size options, directly impacting the level of detail captured. Larger sizes, like Large (typically 3008 x 2000 pixels), are ideal for prints and cropping, preserving intricate details.
Medium and Small sizes create smaller files, suitable for web use or when storage space is limited. Higher resolution equates to larger file sizes, demanding more memory card capacity. Carefully consider your intended use to select the optimal balance between detail and file size for each shot.

White Balance Adjustment
Accurate color reproduction hinges on proper white balance adjustment. The Nikon D40X provides several preset options – Auto, Incandescent, Fluorescent, Direct Sunlight, Flash, Cloudy, and Shade – to match common lighting conditions. Auto White Balance is convenient, but can sometimes be inaccurate.
For critical shooting, utilize preset modes or create a custom white balance using a gray card. This ensures colors appear natural and true-to-life. Incorrect white balance results in color casts (e.g., images appearing too blue or orange). Experiment to find the setting that best suits your scene.
Picture Control Settings
Picture Control settings on the Nikon D40X allow you to customize the look of your images directly within the camera. Choose from Standard, Neutral, Vivid, Monochrome, and Portrait. Each preset alters sharpness, contrast, brightness, and saturation.
Standard is a versatile all-purpose setting. Vivid boosts colors for striking images. Portrait softens skin tones. You can further fine-tune these presets by adjusting individual parameters. Saving custom Picture Controls lets you quickly recall your preferred look. Experiment to discover the settings that best match your photographic style and subject matter.
Connectivity and Data Transfer
Connecting your Nikon D40X to a computer enables seamless image transfer and camera control. Utilize a compatible USB cable for a direct connection. Nikon Transfer software, available separately, simplifies the process of downloading photos and videos. This software also facilitates basic image editing and organization.
Ensure the camera is powered off before connecting. The D40X will typically appear as a removable drive on your computer. Alternatively, explore options for wireless transfer using compatible accessories. Regularly backing up your images is crucial for safeguarding your precious memories.
Connecting to a Computer
Establishing a connection between your Nikon D40X and a computer is straightforward using a standard USB cable. Begin by ensuring the camera is completely powered off before plugging in the cable. Your computer should recognize the D40X as a removable storage device, allowing you to access the images and videos stored on the memory card.
For optimized transfer and management, consider installing Nikon Transfer software. This dedicated application streamlines the process, offering features like automatic downloading and basic image organization. Always safely eject the camera from your computer before disconnecting the USB cable to prevent data corruption.
Using Nikon Transfer
Nikon Transfer is a powerful, yet user-friendly, application designed to enhance your workflow when moving images from your Nikon D40X to your computer. After installation, launch the software and connect your camera via USB. Nikon Transfer will automatically detect the D40X and present options for downloading photos and videos;
You can customize download settings, including file naming conventions and destination folders. The software also offers basic image browsing and organization capabilities. Regularly updating Nikon Transfer ensures compatibility and access to the latest features, optimizing your image transfer experience and overall efficiency.